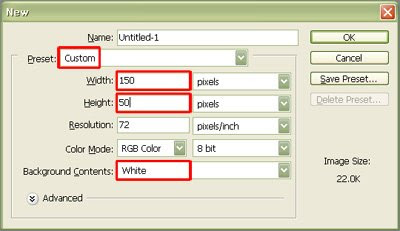
Go to File->New or press Ctrl+N to open new layer.
Please follow the red box :D
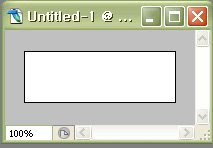
 Tada! You opened the new layer!
Now, lets move our cursor key to
the tool below:

If you clicked it, please look under the menu bar.
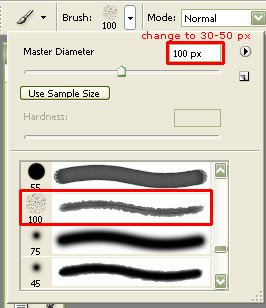
Did you find the brush tool there? Now click the arrow under there
and choose your favourite brush.
I selected that brush and I recommend that.
If you chose that, please adjust the size (px).
Choose your favourite colour, then press Shift button
and draw on the surface.
 I did pink, yays! :D
did you get this?
 Now, press this Horizontal Type tool
and write your whatever in that brush drawn on layer.
I recommend Verdana 10px None.

If you wrote it, yay, it's done :D!
Okay, blogger.com quality is very funny.
Next lesson, we are going to learn how to write
use brush well. We are going to write something :D
Okay, well done, and please click url down there
to see better quality of works & other banners.
Thanks.
http://i283.photobucket.com/albums/kk316/avel_princess/avel_nonmovingbanner_1.jpg
Non-moving Avel Banner
http://i283.photobucket.com/albums/kk316/avel_princess/nametag_done.jpg
Name Tag sample

No comments:
Post a Comment